


Featured
The Lego Technic Forest Machine : Creating something from nothing
Lego has always been designed to challenge a child’s imagination. Thousands of kits are available, each suited to different age groups. The idea of the Technic range is to teach children the basics of gears, motors, electrics and mechanics. SEAN BACHER puts his building skills to the test with the Lego Technic Forest Machine.
Module 2: The trailer
STEP 222: The trailer will house the motor and batteries
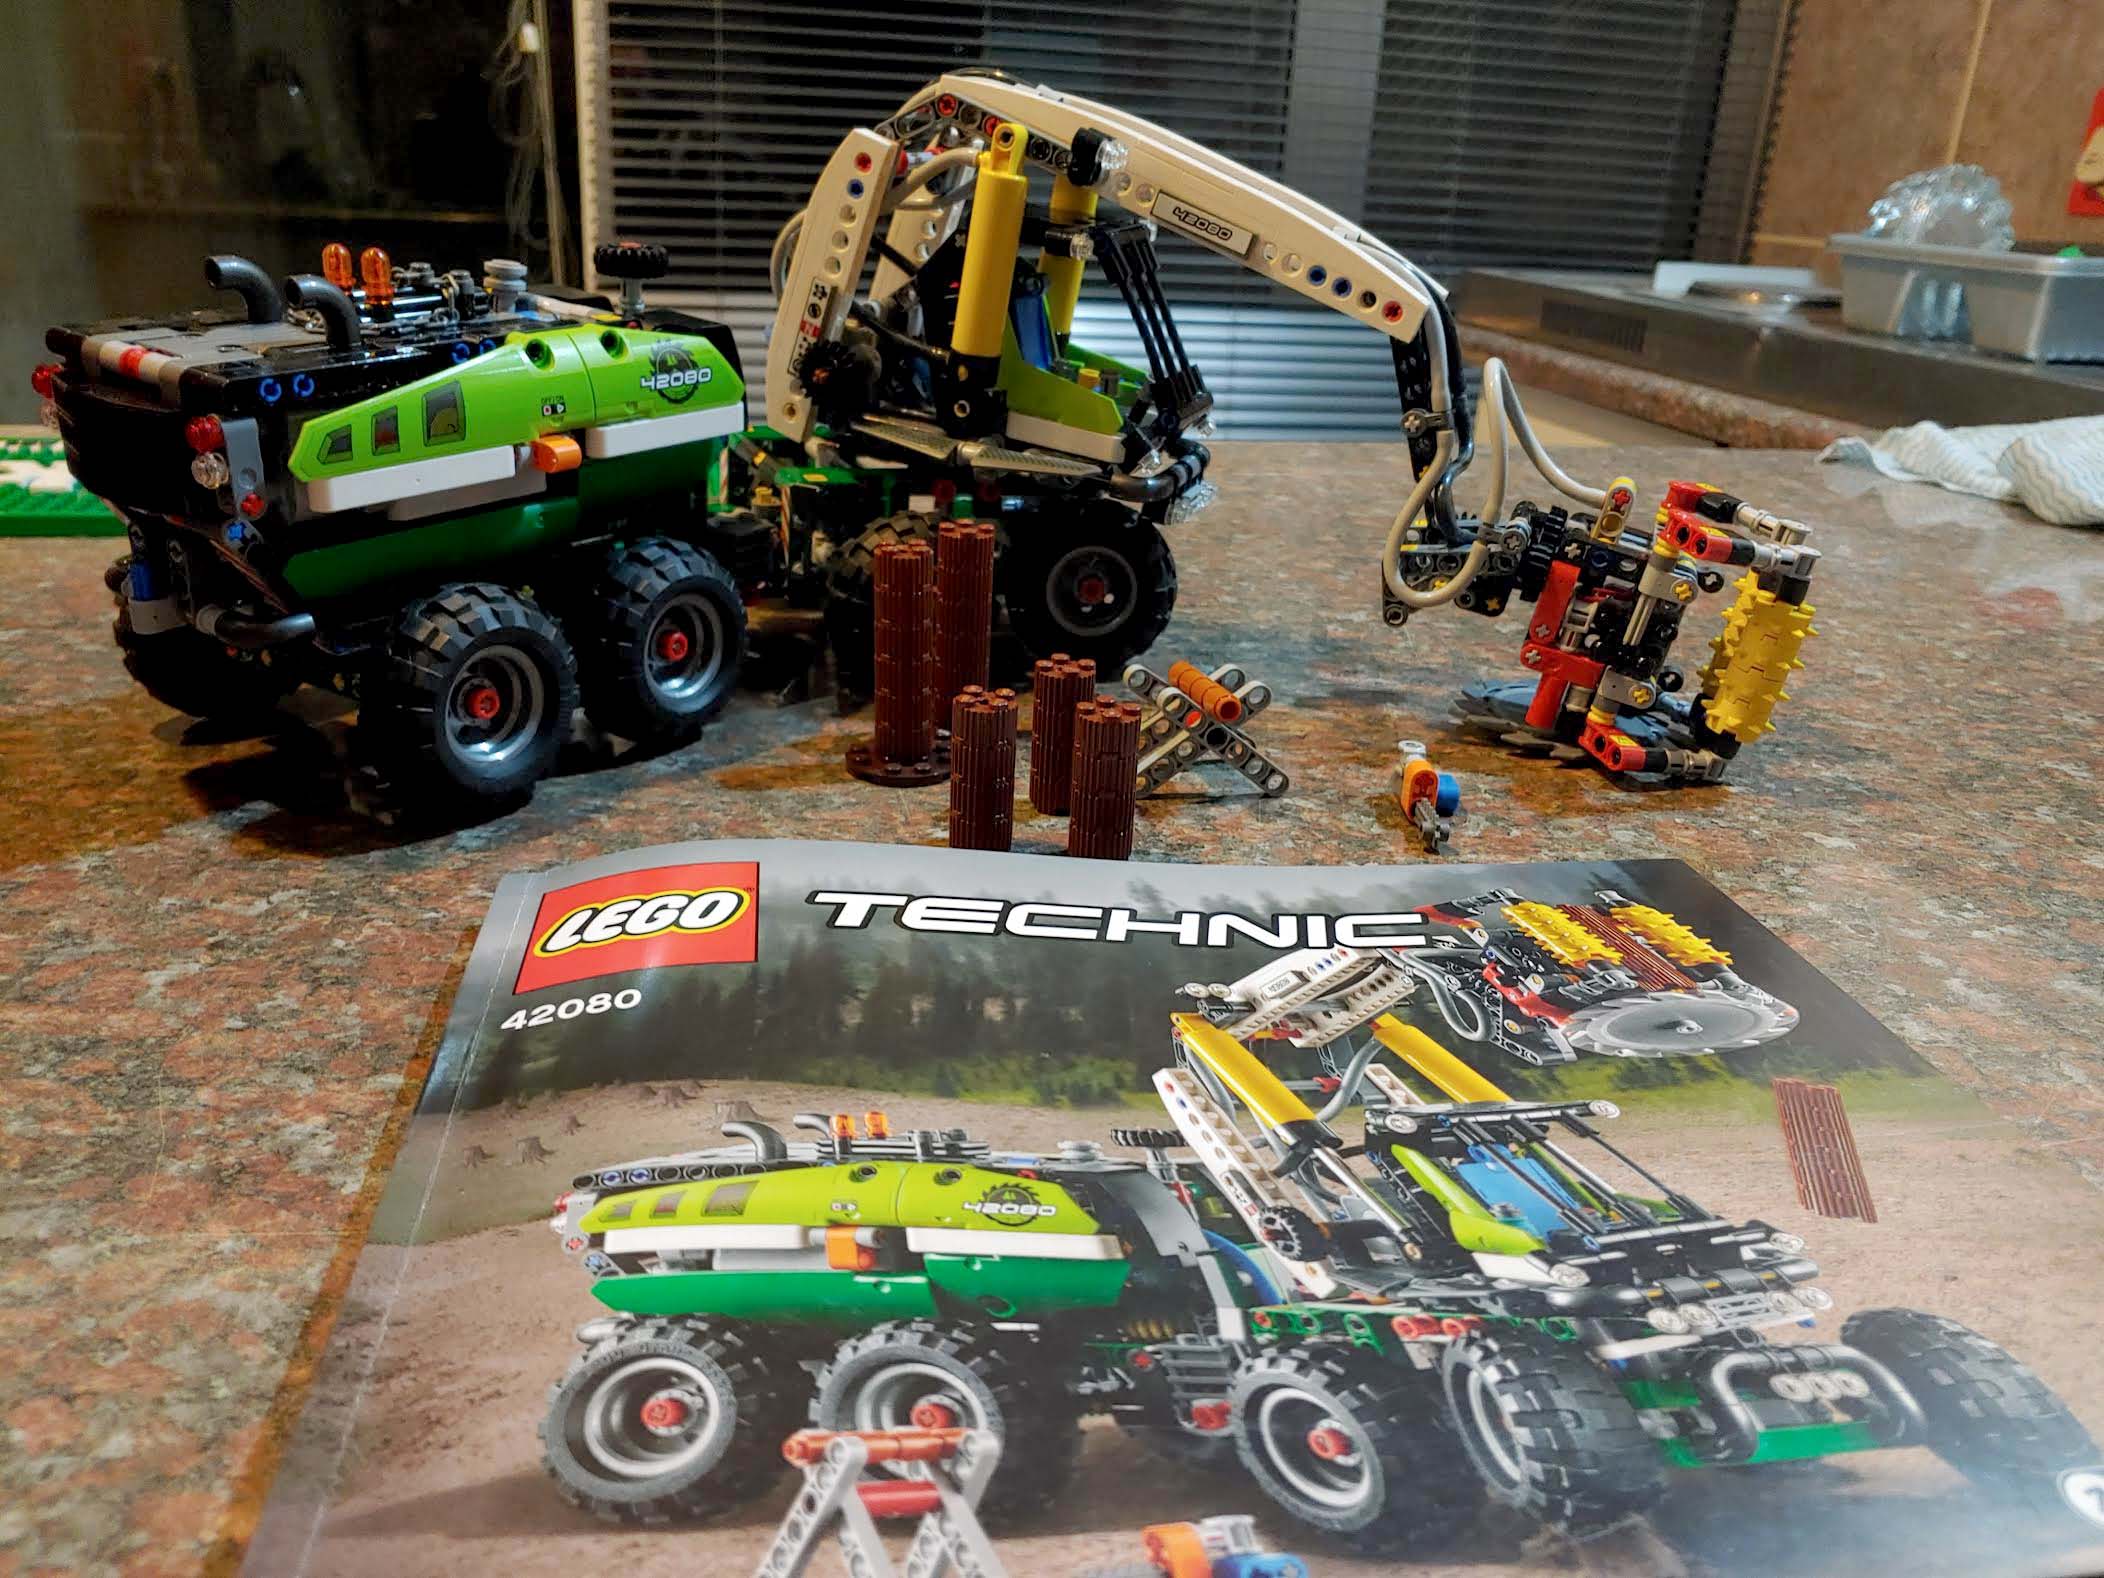
After completing module one – the cab – the trailer is beginning to take shape. Two additional wheel shafts are connected to the chassis as well as a gear (seen on the right) which will connect to the one installed at the bottom of the cab, allowing the two parts of the machine to move independently of each other.
Also, the motor has been installed and has been connected to the main air pump which, when running, will pressurise the pistons and tubes throughout the entire Forest Machine.
Another important part is the black knob at the top of the trailer which will be used to control the front wheels through the various cogs and gears and in turn allow the trailer to follow the direction of the cab.
A latch has also been installed which allows for easy access to the battery and motor compartment.

Step 267: The cab and trailer are linked
After building for about two and a half hours the cab and trailer have come together, and without any hassles I might add.
Eight wheels have been added to their shafts and are rotating freely. The knob at the top that allows one to turn the front wheels does so perfectly and directs the trailer in the same direction through the smaller cog meshing with the larger one.
Also visible is the main blue air tube which is connected to the air pump in the trailer and splits into two to connect to the pneumatic valves mounted in the cab.
The attention to detail has not been lost on the trailer either. The exhaust pipes, stickers and lights are all in place. Two ladders, a tool box, spade and pick have also been mounted.

Step 269: Air delivery system is taking shape
At last the pneumatics are coming into play. The blue tubes are the main lines with the one connected to the air pump and delivering air to the two valves through a T piece.
Also connected to the valve are black and grey tubes. The black ones will deliver compressed air to the pistons and claw at the end of the crane, while the grey ones will remove the air. This in effect creates an air delivery and release system.
In keeping up with attention to detail, the red cylinder to the left of the valve is a Lego’s fire-extinguisher.

Step 275: Pistons in place
The pistons have attached the boom to the cab with their air tubes ready to deliver and release air.

STEP 275: Luckily the pivots are in the correct slots, otherwise the pistons would not connect correctly.
Read more on the next page about the crane assembly.


